Visualizer
Rythm's highly-customizable visualizer tool brings your favorite tracks alive by creating a visualization of the song audio.
Using The Visualizer
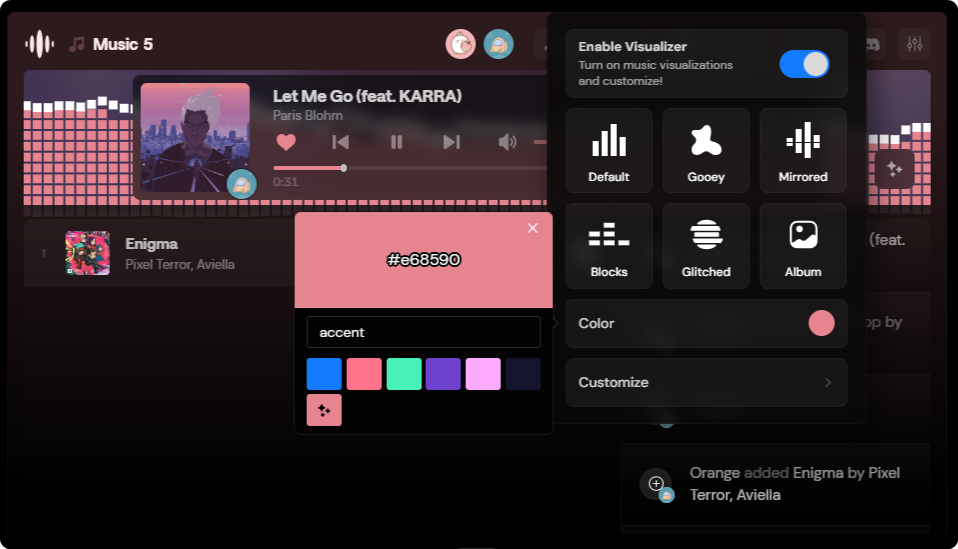
Click on the  button on the right of the music control panel, and hit Enable Visualizer.
You can also try out other built-in presets like Gooey, Mirrored, or Blocks.
Customizing The Visualizer
You can also customize the visualizer however you see fit. Find a preset you like and edit from there, or start entirely from scratch.
Changing Color
You can change the color of your visualizer by clicking on the Color option.

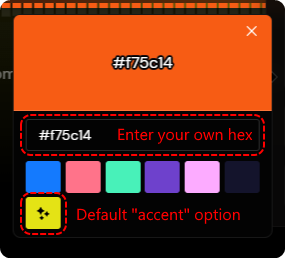
By default, the visualizer will use the accent option, which takes the most dominant color from the track cover. The accent color is also what is used to theme your client! If you want your visualizer to match your client, keep it on accent. You can choose a different color from the set, or provide another hex color code of your choice by typing where the word "accent" is.

Advanced Customization
You can tweak the visualizer to get it just the way you like it. Head to the Customize tab to see more options.
Customize Toggles
Customize Toggles List
Cap Color
- Changes the color of the caps.
Glitch
- Enables the glitch effect seen in the Glitch preset. Not very visible without the blocks setting.
Blocks
- Enables the blocks effect seen in the Blocks preset.
Enable Caps
- Enables the caps that sit atop the frequency columns.
Cap Fade
- Cap fade makes the caps higher in opacity and less white.
Use Album Art
- Paints the album art over the visualizer.
Mirrored
- Mirrors the visualizer along a horizontal line.
Symmetry
- Mirrors the visualizer along a vertical line.
Bar Reflections
- Adds a slight "reflect" effect similar to a shadow that goes below the visualizer.
Customize Slider Settings
Customize Slider Settings List
Performance Slider
- The performance slider allows you to determine if you want the visualizer to be highly performant or have higher quality. The performance direction removes granularity in the display. There will be less columns to display frequencies. The quality direction increases the amount of granularity by increasing the amount of columns to display frequencies.
Intensity
- Amplifies multiplicatively how sounds are displayed in your visualizer. Smaller sounds will appear larger.
Smoothness
- Adds smoothing to the transition of one frequency bar to the next. This results in less columns sticking out from the rest.
Bar Size
- Changes how big the frequency columns are. Smaller numbers create more columns. It is recommended to not go below 2.
Bar Spacing
- Changes the spacing between the bars. A higher value spaces the bars apart more.
Gooey Intensity
- This is the effect seen in the Gooey preset. Higher intensity makes things more gooey.
Cap Gravity
- Changes the gravity the caps experience when falling back to the frequency column.
Sharing Presets
Just created the best visualizer ever? Share it with your friends by heading to the Customize tab and clicking the  button on the top right. You can copy the text to send it elsewhere, or paste other presets in to apply your friends' presets.